
Your normal database clients continue to work once Cyral protection is added to your databases. Below, we show how to use the DBeaver SQL client to connect to a Cyral-protected MySQL database. To get DBeaver, download the community or Enterprise edition from https://dbeaver.io/download/
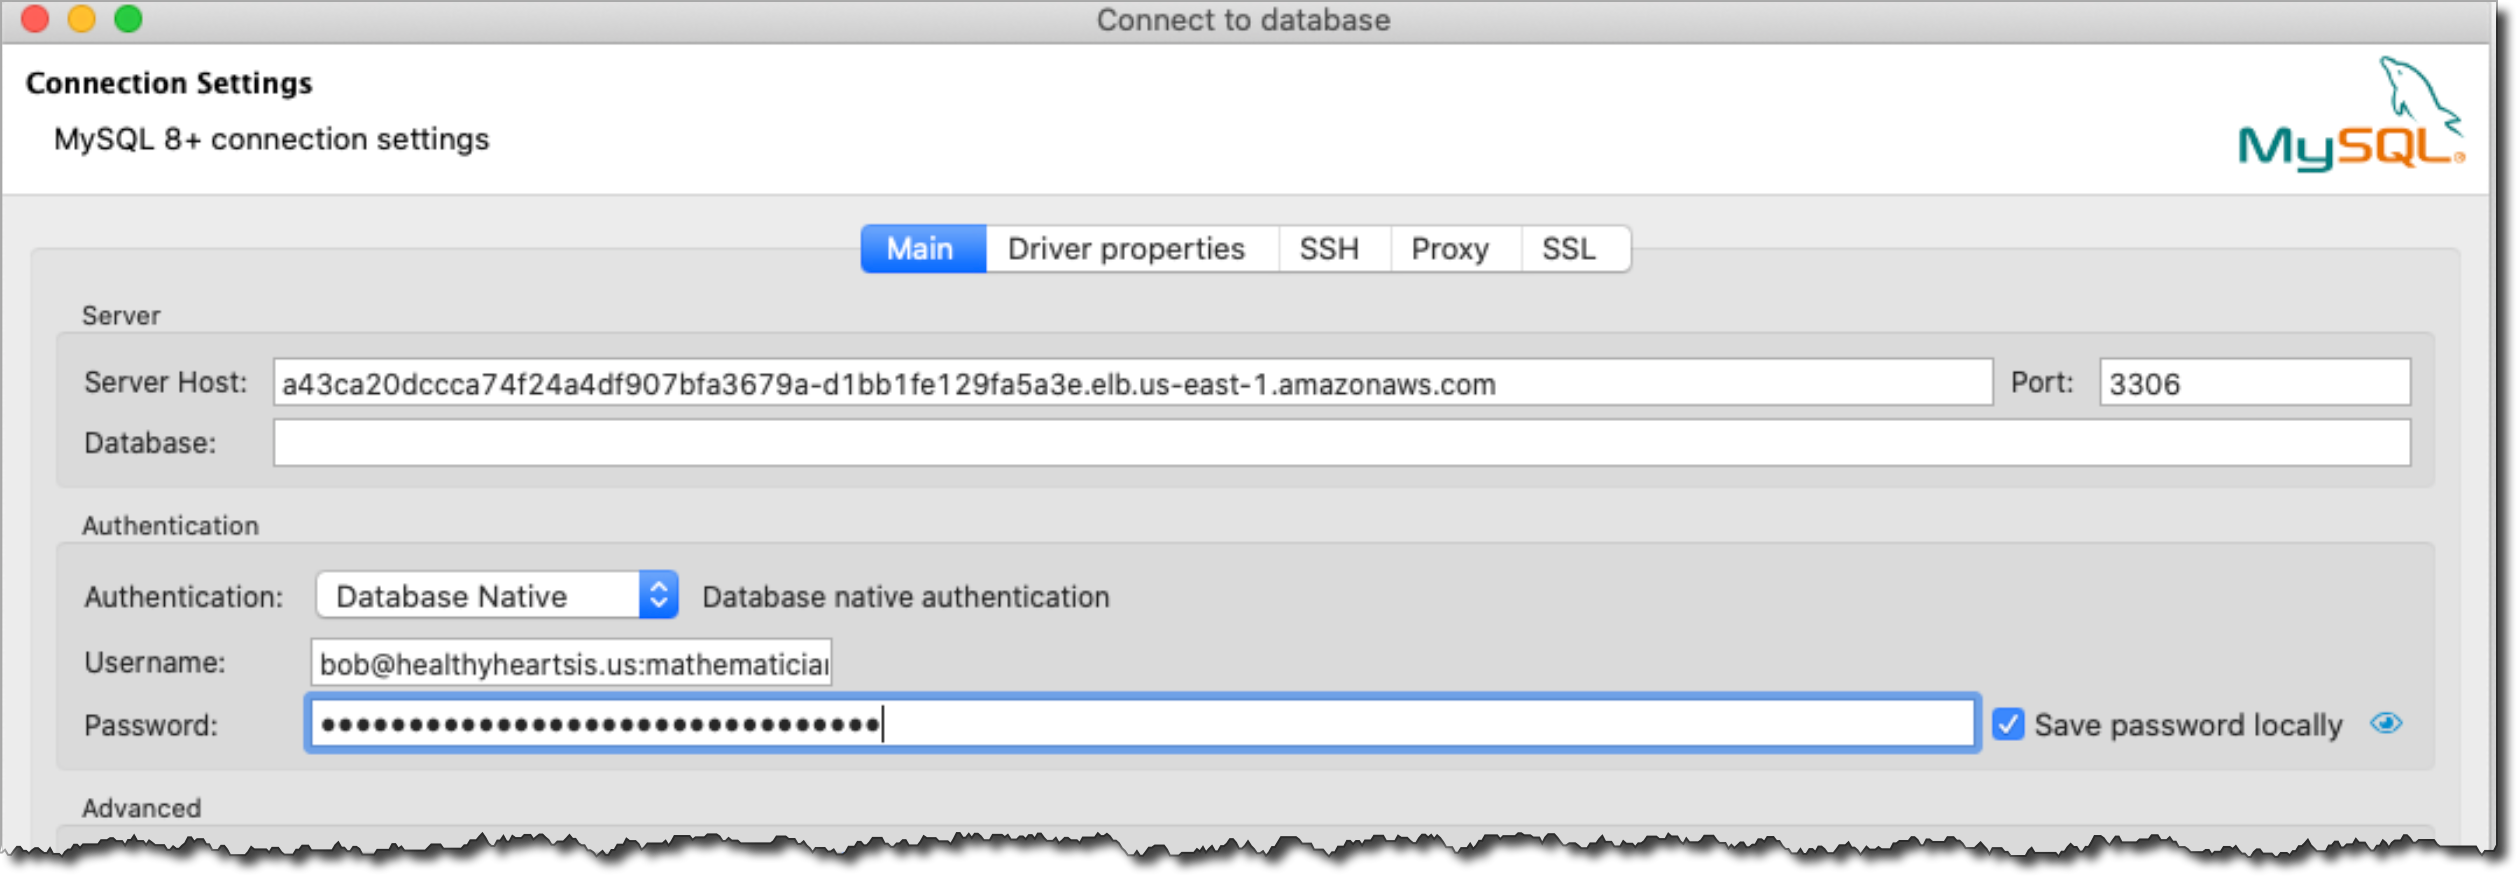
1. In DBeaver, set up a new connection for MySQL (version 5+ or version 8+). Provide the connection values as noted below:
- Server Host: Address of the Cyral sidecar, which may be a load balancer address. If the sidecar is reachable through an SSH tunnel, specify the host as
127.0.0.1 - Port: Repository port of the Cyral sidecar
- Authentication: Database Native
- Username:
- If not using SSO, provide the database user name;
- If using Cyral SSO, provide the SSO user name and group, for example:
bob@healthyheartsis.us:mathematician
- Password:
- If not using SSO, provide user's usual database password;
- If using Cyral SSO, provide the SSO token.
2. Go to Driver properties and provide the following values (see also the screenshot after the lists):
- Mysql 5+ settings:
- authenticationPlugins:
com.mysql.jdbc.authentication.MysqlClearPasswordPlugin - disabledAuthenticationPlugins (Note: If this key does not exist then create it):
com.mysql.jdbc.authentication.MysqlNativePasswordPlugin - defaultAuthenticationPlugin:
com.mysql.jdbc.authentication.MysqlClearPasswordPlugin
- authenticationPlugins:
- Mysql 8+ settings:
- authenticationPlugins:
com.mysql.cj.protocol.a.authentication.MysqlClearPasswordPlugin - disabledAuthenticationPlugins (Note: If this key does not exist then create it):
com.mysql.cj.protocol.a.authentication.MysqlNativePasswordPlugin - defaultAuthenticationPlugin:
com.mysql.cj.protocol.a.authentication.MysqlClearPasswordPlugin
- authenticationPlugins:
Setting the driver properties in DBeaver:

3. Set the SSL parameters. Go to the SSL tab and:
- Make sure the Use SSL checkbox is ON.
- Make sure the Verify server certificate checkbox is OFF.

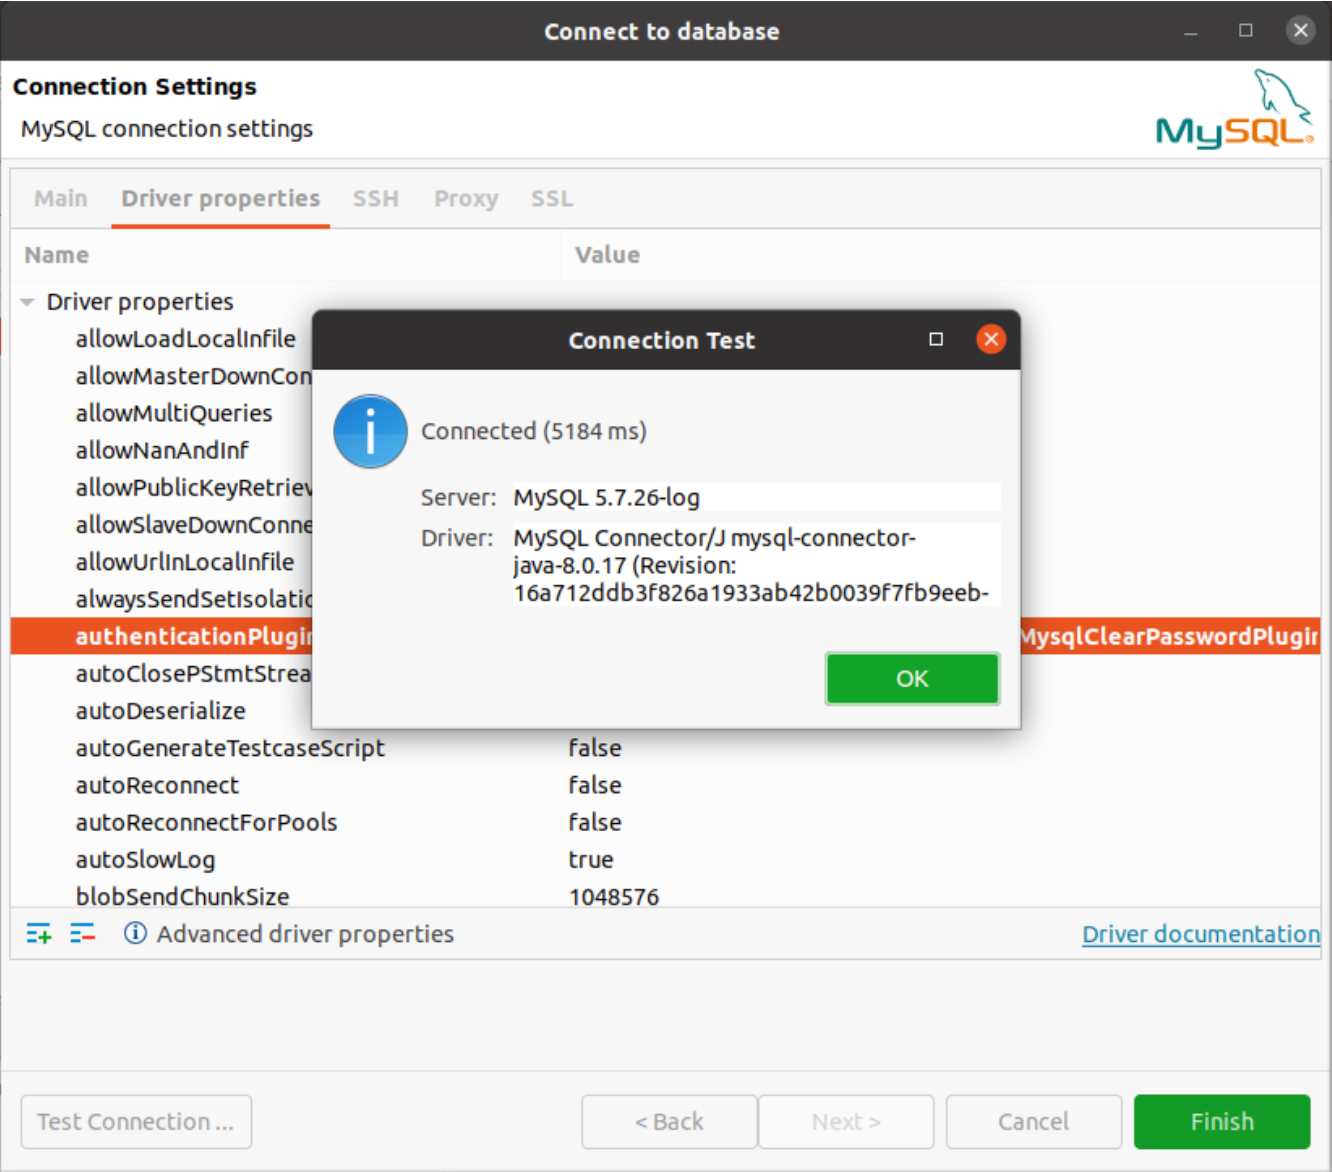
4. Click on Test Connection before hitting Finish to make sure you've connected to the database. You should see something like the screenshot below when the connection is successful.
5. Click the Finish button and you will be redirected to DBeaver’s main screen. There, you can double click on the new Database entry that you created. You should be able to see the schema or table listing, as displayed in the image below:

